

Philips coffee makers are renowned for their advanced technology and user-friendly layout. Each factor, from the water reservoir to the touch show, plays an important role in handing over a first-rate espresso experience. This guide explores the detailed elements of Philips coffee makers and gives realistic guidelines on how to use them efficiently, ensuring you get the most out of your device.
Philips espresso creators brag about different great parts that fundamentally add to their unrivaled presentation and solidity. We should dive into the subtleties of these parts and give a bit-by-bit guide on the most proficient method to utilize each part, guaranteeing an excellent espresso-making experience.
Understanding and Using the Philips Coffee Maker: 12 Parts
- Water Repository
- Bean Container
- Processor
- Blending Unit
- Milk Frother
- AquaClean Water Channel
- Espresso Spout
- Dribble Plate
- Contact Show
- Siphon
- Warming Component
- Channel Container
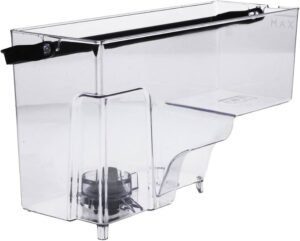
1. Water Repository
Most importantly, the water repository stands apart as an urgent piece of any espresso creator. In Philips espresso makers, the water supply is normally removable, making it amazingly simple to fill and clean. As you investigate various models, you will see that the repository’s ability changes, going from minimized sizes appropriate for single-serve machines to larger capacities for multi-cup brewers. This flexibility guarantees that you can find a Philips espresso creator that impeccably meets your requirements.
- Instructions to Use: To utilize the water reservoir, start by removing it from the espresso maker by lifting it out or sliding it off, contingent upon the model. Then, fill the supply with new, chilly water up to the demonstrated greatest fill line. From that point forward, replace the repository into the espresso producer, guaranteeing it sits safely set up.
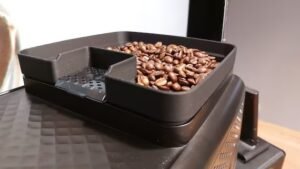
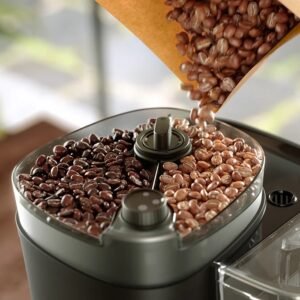
2. Bean Container
Notwithstanding the water supply, the bean container assumes a crucial role by storing the espresso beans before grinding. Philips espresso creators with built-in processors highlight a bean container that keeps the beans fresh until they are ground. Besides, the container typically holds a lot of beans, which decreases the requirement for regular tops.
- The most effective method is to use the bean container, open the top, and pour in your ideal espresso beans. From that point forward, close the top to keep up with the newness of the beans. Assuming your model permits, change the drudgery setting to choose the coarseness of the toil according to your preference.
3. Processor
Besides, Philips espresso creators frequently incorporate a strong ceramic processor. Earthenware processors are favored in light of the fact that they don’t overheat, hence protecting the fragrance and kind of espresso beans. Moreover, the processor normally offers various settings, permitting clients to pick the drudgery’s coarseness as per their inclination.
- Instructions to Utilize: On the off chance that your Philips espresso creator incorporates a processor, you will find a handle or dial to change the drudgery size. Select the appropriate drudgery size for your espresso type. The machine will naturally crush the perfect proportion of beans when you start the fermenting system.
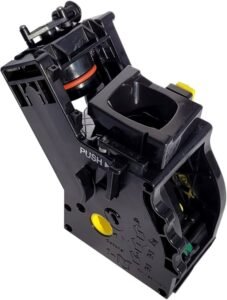
4. Blending Unit
Moreover, the blending unit serves as the core of the espresso producer. It blends the espresso by forcing high-temperature water through the ground espresso. In Philips machines, the fermenting unit is frequently removable, which makes it simple to clean and keep up with.
- The most effective method to utilize is to add the prepared unit to the espresso producer, adhering to the client manual’s directions. Guarantee that it remains safely set up. At the point when you start the fermenting system, the unit will consequently deal with the extraction.
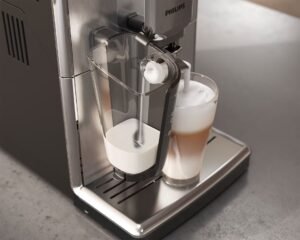
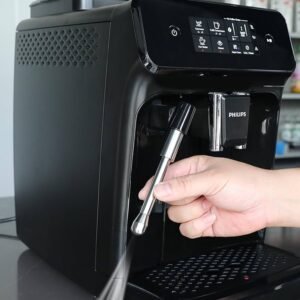
5. Milk Frother
Numerous Philips espresso producers accompany a milk frother, like the LatteGo framework. This part froths milk to the ideal consistency for cappuccinos, lattes, and other milk-based drinks. The LatteGo framework, specifically, is known for its simplicity of cleaning, as it comprises just two sections without any cylinders.
- The most effective method to use is to utilize the milk frother and pour the ideal amount of milk into the milk frother compartment. Attach the compartment to the espresso creator. Select the milk foaming choice on your machine. The machine will foam the milk to the ideal consistency.
6. AquaClean Water Channel
Another critical component is the AquaClean water channel, which altogether decreases the requirement for descaling. Sifting the water before it enters the machine eliminates pollution and lessens scale development. Thus, this results in better-tasting espresso and less successive descaling, working on support, and upgrading the machine’s life span.
- The most effective method is to utilize the AquaClean channel, absorb the water for a couple of moments, and then shake it to eliminate any air bubbles. Embed the channel into the assigned space in the water supply. Supplant the repository back into the machine. Intermittently supplant the channel, as demonstrated by the machine.

7. Espresso Spout
Notwithstanding these highlights, the espresso ramble apportions the fermented espresso into your cup. Philips espresso producers frequently highlight a flexible espresso spout to accommodate different cup sizes, from small coffee cups to large travel cups. This adaptability guarantees that you can blend espressodirectlyy into your favorite compartment.
- Step-by-step instructions to utilize: Change the espresso spout to the level of your cup. Place your cup under the spout. While the preparation system starts, the espresso will be administered directly into your cup.
8. Dribble Plate
In addition, the dribble plate catches any spills or floods from the preparation system. It is normally removable and dishwasher-safe, making it simple to clean. A few models highlight a flexible trickle plate to accommodate different cup sizes and prevent splashes, which further improves the espresso-making process.
- Instructions to Utilize: Guarantee the dribble plate is appropriately situated underneath the espresso ramble. Subsequent to blending, eliminate the dribble plate and void any gathered fluid. Clean it routinely to keep up with cleanliness.

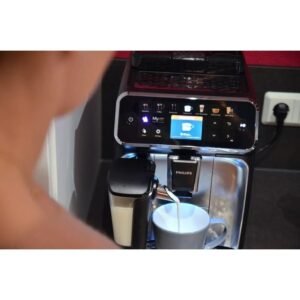
9. Contact Show
Numerous Philips espresso creators come outfitted with a natural touch. This control board permits clients to effortlessly choose and modify their espresso ipreferences
- Step-by-step instructions to utilize: Utilize the touch screen to choose your ideal espresso type and alter settings like espresso strength and volume. Follow the on-screen prompts for any extra advances, for example, adding milk or changing the towel size.
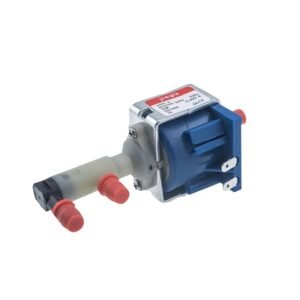
10. Siphon
The siphon produces the tension expected to brew coffee. In Philips espresso makers, the siphon gives steady pressure, guaranteeing that the coffee beans are appropriately extracted for a rich and tasty coffee.
- Step-by-step instructions to utilize: The siphon works naturally when you start the preparation system. Guarantee the machine is appropriately kept up with to keep the siphon in great working condition.
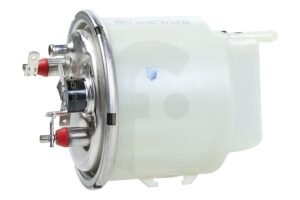
11. Warming Component
The warming component keeps up with the right temperature through the preparation system. Philips utilizes advanced warming advancements, such as the ThermoBlock framework, to rapidly warm water to the ideal blending temperature and keep it.
- Instructions to Utilize: The warming component works naturally. Guarantee the machine is appropriately descaled and kept up with to keep the heating element working efficiently.
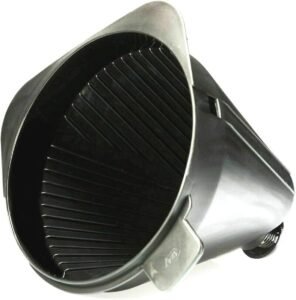
12. Channel Container
Ultimately, the channel bushel holds the coffee beans during the preparation process. Philips espresso producers frequently accompany a long-lasting channel container, which is eco-accommodating and savvy, killing the requirement for paper channels.
- The most effective method to utilize is to add the ideal amount of ground espresso to the channel container. Embed the brush into the espresso producer. In the wake of preparing, eliminate the crate, dispose of the pre-owned grounds, and clean the container for the next use.
Conclusion
Taking everything into account, Philips espresso creators work with top-caliber, imaginative parts that guarantee strength, convenience, and unrivaled espresso quality. Every part is planned in view of the client, offering comfort, customization, and great execution. By adhering to the nitty-gritty directions on the most proficient method to utilize each part, you can completely partake in the extraordinary espresso experience that Philips espresso producers provide.