
In the ever-evolving world of espresso, owning a Breville coffee maker can certainly increase your home brewing enjoyment. These machines offer unprecedented flexibility and precision, allowing you to craft café-nice liquids right in your kitchen. Whether you are a beginner barista or a pro espresso fanatic, knowing how to properly use and hold your Breville gadget is important. In this blog, we’ll guide you via exact commands for diverse Breville espresso makers, making sure you extract the maximum from your coffee adventure. Get geared up to brew like a seasoned pro with Breville!
Importance of Following Proper Instructions for Breville Coffee Makers
In the vibrant realm of espresso tradition, owning a Breville espresso maker is not just a convenience—it’s a gateway to studying the art of brewing. These sophisticated machines redefine domestic espresso reports with their remarkable precision and flexibility. Whether you are a curious newcomer or a seasoned aficionado, knowing how to harness the entire potential of your Breville system is pivotal. This blog is your complete guide to studying various Breville espresso makers, making sure each cup brewed at home rivals your preferred café. Get ready to elevate your coffee recreation and indulge in the rich flavors of Breville craftsmanship. Let’s brew excellence together!
1. Breville Nespresso Creatista Plus (BNE800DBL)
Setup
To begin, unbox the Breville Nespresso Creatista Plus and eliminate all packaging substances. Next, smooth the water tank, milk frother, and drip tray with warm, soapy water. Attach the milk frother to the machine and securely insert the water tank.
Brewing Coffee
First, fill the water tank with sparkling, cold water as much as the MAX line. Then, insert a Nespresso coffee tablet into the unique slot. Use the control panel to pick your chosen coffee size. Press the start button to start brewing. The device will automatically alter the brewing parameters, primarily based on the capsule you insert.
☕ Ready to Brew Like a Pro?
Upgrade your mornings with a top-rated Breville espresso maker.
👉 Check Prices on Amazon
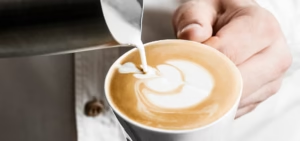
Steaming Milk
For steaming milk, pour bloodless milk into the chrome steel milk jug. Position the steam wand simply below the milk’s floor and activate it. The system will automatically froth and steam the milk to your preferred settings. Finally, pour the steamed milk into your brewed coffee, developing perfect lattes, cappuccinos, or other milk-based drinks.
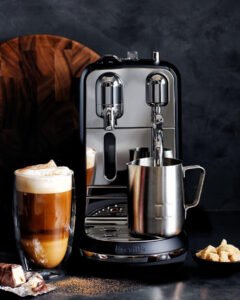
2. Breville Milk Café Frother (BMF600XL)
Setup:
First, unbox the Breville Milk Café Frother and do away with all packaging materials. Then, fill the jug, lid, and frothing discs with warm, soapy water. Attach the frothing disc of your desire to the frother.
Frothing Milk:
To start, pour bloodless milk into the jug, filling it to the desired degree in your beverage. Place the jug on the bottom and stabilize the lid. Next, choose the favored temperature and frothing type (cappuccino or latte) from the manage dial. Press the begin button to begin frothing. The frother will warm and froth the milk to your preferred settings.
Serving:
Once the frothing cycle completes, pour the steamed milk into your coffee or warm chocolate. Enjoy the creamy, perfectly frothed milk that enhances your beverage.
💡 New to Using a Breville Espresso Maker?
Don’t worry—we’ve got guides to help you master every feature.
👉 Explore More Breville Tips
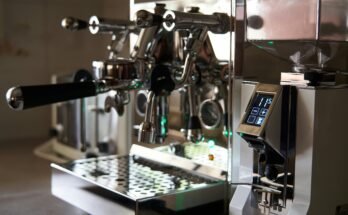
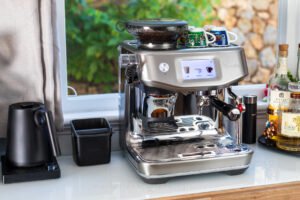
3. Breville the Oracle Touch Automatic Espresso Machine (BES990DBL)
Setup:
To start, unbox the Breville Oracle Touch Automatic Espresso Machine and take off all packaging materials. Next, smooth the water tank, portafilter, and steam wand with hot, soapy water. Attach the water filter to the tank and insert it securely into the gadget.
Making Espresso:
First, fill the water tank with clean, bloodless water up to the MAX line. Then, pick out your chosen coffee beans and fill the bean hopper. Use the touchscreen to pick out your coffee type and adjust the grind length. The system will routinely grind, dose, and tamp the espresso into the portafilter. Lock the portafilter into the group head and press the start button to begin extraction.
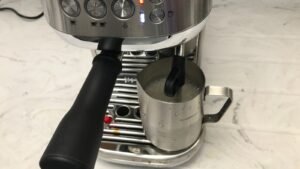
Steaming Milk:
For steaming milk, pour bloodless milk into the chrome steel milk jug. Position the steam wand just under the milk’s floor and set it off. The machine will mechanically froth and steam the milk to your preferred texture and temperature. Finally, pour the steamed milk into your brewed espresso, making scrumptious lattes or cappuccinos.
🧼 Keep Your Breville Espresso Maker in Peak Condition!
Check out our detailed cleaning and maintenance guide.
👉 Read the Full Guide
4. Breville the Bambino Plus Espresso Machine (BES500DBL)
Setup
To begin, unbox the Breville Bambino Plus Espresso Machine and remove all packaging materials. Next, smooth the water tank, portafilter, and steam wand with warm, soapy water. Attach the water filter to the tank and insert it securely into the system.
Making Espresso
First, fill the water tank with fresh, bloodless water up to the MAX line. Then, grind your espresso beans to the desired fineness with the help of a nice grinder. Tamp the grounds flippantly into the portafilter and lock it into the group head. Select your preferred shot size and press the precise button to start the extraction technique.
Steaming Milk
For steaming milk, pour cold milk into the stainless-steel milk jug. Position the steam wand simply beneath the milk’s surface and set it off. The gadget will automatically froth and steam the milk to your selected texture and temperature. Finally, pour the steamed milk into your brewed coffee, creating ideal lattes or cappuccinos.
🔥 Top Deals on Breville Espresso Makers Today
Save big while upgrading your coffee setup — limited-time offers!
👉 See Today’s Breville Deals
Conclusion
Your daily coffee routine will be more pleasurable if you are familiar with your Breville espresso machine or frother. You can improve both the quality of your brews and the condition of your machine by strictly adhering to those in-depth instructions. If you maintain it on a regular basis, your Breville will continue to produce excellent coffee drinks for many years to come. No matter how experienced you are as a barista, these machines offer excellent flexibility and control when it comes to making drinks of café-quality drinks at home. You will learn about the rich and delicious world of fine coffee as you start on this adventure with Breville. I’m pleased with the brewing and anticipate many more scrumptious cups to come!
FAQ’s
1. How do I clean my Breville espresso machine?
Maintain your Breville espresso machine by descaling the entire head, washing the steam wand, and flushing it on a regular basis.
2. What is the top Breville espresso machine for a beginner?
The Breville Bambino Plus is ideal for beginners. It comes equipped with automatic frothing of milk and easy controls for a smooth, silky espresso.
3. Can I make ground coffee in my Breville espresso machine?
Yes, most Breville espresso machines use ground coffee. The best quality will be by a high-quality burr grinder.
4. How often do I descale my Breville espresso machine? De-scale your
A Breville espresso machine must be cleaned every 1-3 months, depending on water quality and use, in order to be able to function at its best.
5. Why is my Breville espresso machine not evaporating milk correctly?
Inspect if the steam wand is clogged or out of place. To get the optimal results, rinse it gently with cold milk.
6. Which Breville espresso machine features a built-in grinder?
The Breville Oracle Touch features an automatic conical burr grinder that grinds, tamps, and measures to deliver perfect espresso.
7. Can you make lattes and cappuccinos using a Breville espresso machine?
Absolutely! Breville espresso machines allow you to quickly steam milk, ideal for lattes, cappuccinos, and other items you see at the café.